DIY Medical Masks with Nose Wire and a Filter Pocket

As a former nurse, and being immunocompromised, I am personally very aware of how scary this rampant virus is. I am watching so many nursing friends facing scary days, equipment shortages, and as all Canadians know, the scariest times are still ahead of us.
Most of us have been home now for 3 weeks and we are doing our part, but the couple of times that I have left the house for supplies, I see everyone wearing paper and medical masks, and have even seen them for sale…but I cannot bring myself to buy or wear them, they are so desperately needed by medical and frontline staff. That said, my brother and his wife live very close to NYC and what a scary place to be right now…so I wondered if I could make something that would help them, and potentially us. Most importantly, it wouldn’t take vital equipment away from the staff who are risking their lives. .
I did a little research and got sewing, all with supplies that I already had. It took several attempts, but my most recent project fits well and snugly. You can totally make them too, with very basic sewing skills. I will walk you through step by step, including how to wear them properly and the research behind what works.
I won’t bore you with the details of the research but if you were interested, which I was, check this site out, and there are very good details about different fabrics, and how they stack up to medical masks. The synopsis is that you need to be using a high quality cotton such as quilting cotton and one layer is not enough. They are certainly not as effective as medical grade N95 masks, but they are better than nothing if used and fitted properly.
Here is what I did:
Finished mask will be 3 layers thick, will have a pocket to insert a filter and will have a nose moulding wire.
SUPPLIES:
-Sewing Machine
-Serger (optional)
-Iron
-3 layers of 7”x7” quality quilting coton
-Elastic 1/8”-1/4” wide, 2 pieces of 8”-9" (depending on fit)
-Seam Binding 2 pieces of 6”x3” or you can use Bias Tape
-Floral Wire or Pipe Cleaner
-Wire Cutters and Needle Nose Pliers
-Pins
-Thread (high quality 100% Polyester)

Step 1
You are going to sew the filter pocket/liner first. Take 2 of fabric square and fold each individually in half, right sides facing out. Press with a steam iron. This crease will be your sewing guide. ( I don’t have a photo of this but you can easily fold a square in 1/2 without a photo I am sure).
Step 2
Open your squares and place them on top of each other, right sides together. Pin at approximately 1/3 and 2/3 of the way up the crease.

Step 3
From the outside edge, sew along the crease to the pin, and backstitch several times. Repeat from other side. You will not sew the middle 1/3 of the crease.

Step 4
Fold your two original squares back upon themselves and your will see the filter pocket is complete. Press.

Step 5
Place your 3rd square on top of your completed filter pocket. The right side of the 3rd piece should be facing in. This will be the front of the mask. Sew top and bottom edges of the square, parallel to your filter slit. I used my serger, but if you don’t have one, a straight stitch followed by a zigzag inside the seam allowance works just fine. I used my presser foot as a seam allowance.
(This is showing the wrong sides out, it is just hard to tell since the lining doesn’t have a wrong side anymore).

Step 6
Turn right sides out, and press.

Step 7
Now you are going to sew the pocket for the nose wire. It’s just a straight line. I used the edge of my presser foot as my guide. Sew along the top of the mask only.

Step 8
Cut a 13” of wire to length and fold in half. Using your needle nose pliers to curl and flatten the tips so that they are no longer sharp. If you are using pipe cleaners, a 6.75” length will work, still curl and flatten your tips.


Step 9
Pleats. To space your pleats easily, fold your mask in 1/2, right side out and your mask hole will but right inside the crease. Press.

Step 10
Flip over so the right side is down. Fold top edge to meet the middle and bottom edge also to meet the middle. Press again.

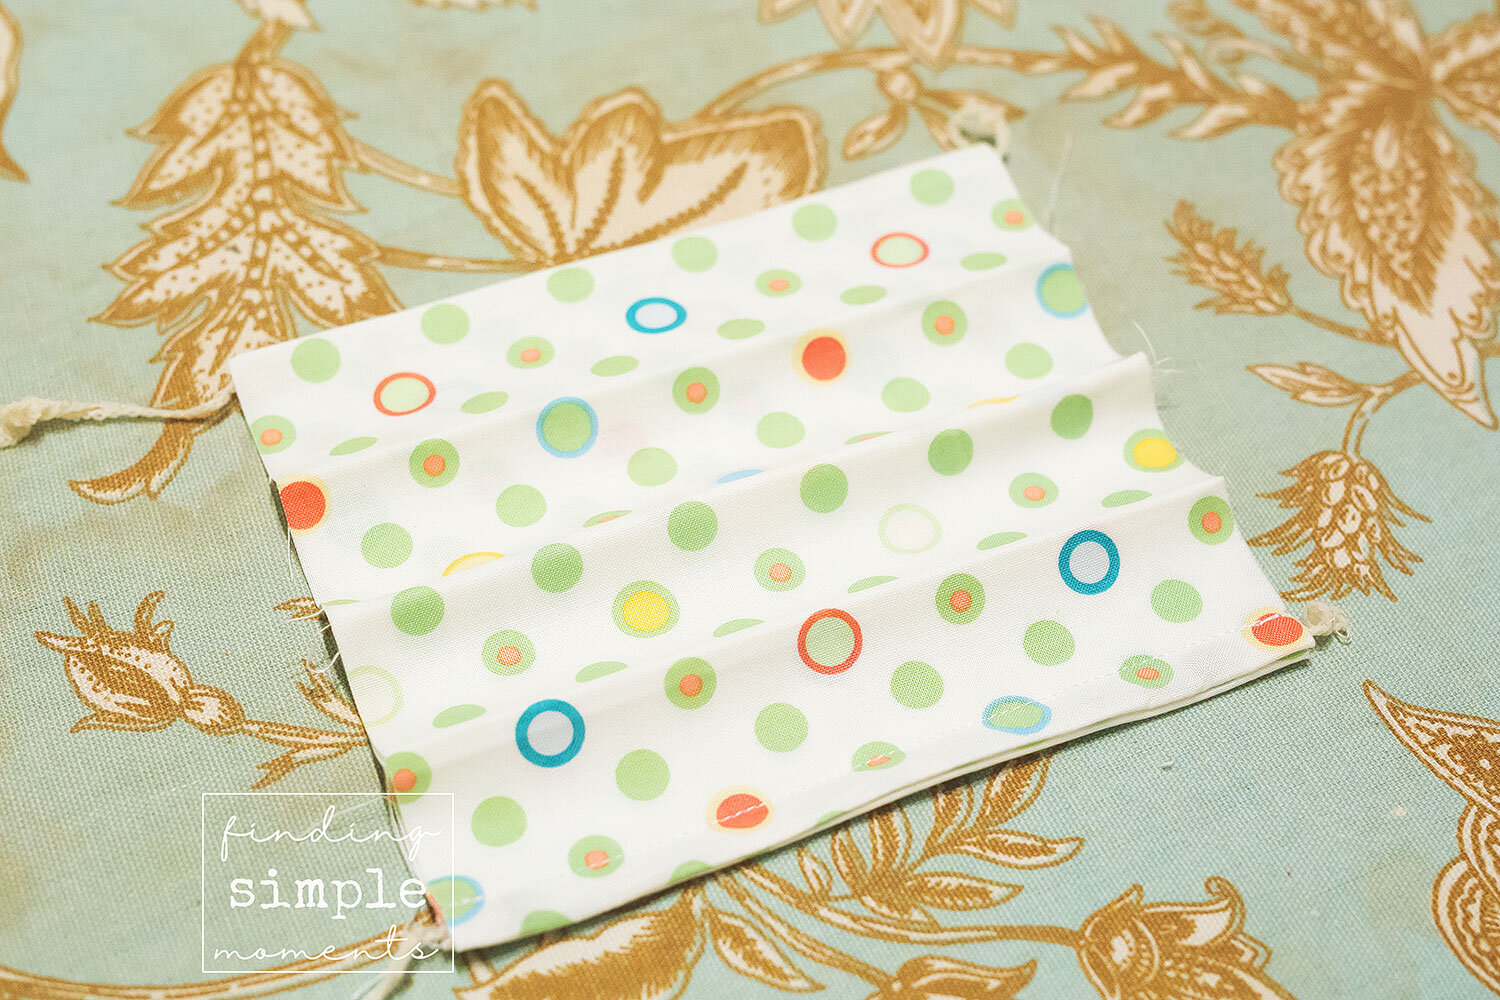
Step 11
Working with the right side towards you, and from the top down, pinch the top crease and fold it over (downwards). About a 1/2” of fabric will fold under. Pin edges and repeat for all 3 creases.

This is what it will look like from the side.

Step 12
Sew the edges of your mask using your presser foot as a seam allowance. I used my serger but you can still use a straight stitch/zigzag combo. Once you have stitched, if you pull the pleats apart you can see the mask is taking shape.

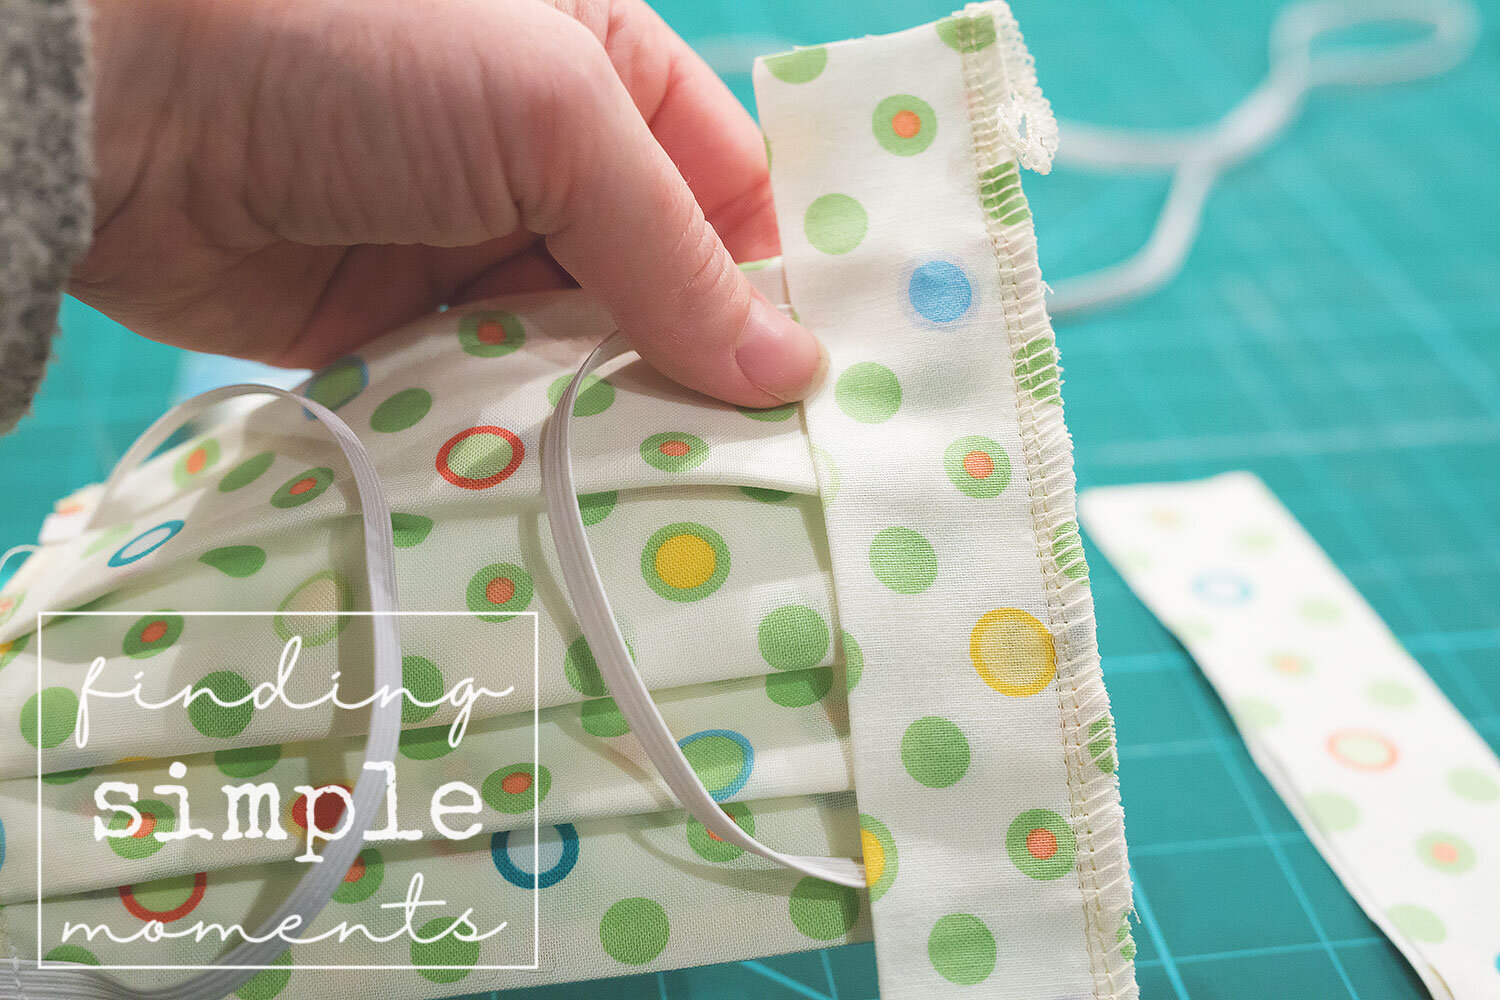
Step 13
Straight stitch on the elastics as below just at the edges of your previous seams. You are sewing the elastics on to the RIGHT side of your mask. If you hold the mask over your face you can roughly measure that your elastic is the correct length before sewing.

Step 14
On to the seam binding… If you haven’t done bindings before, don’t be afraid, they are actually very easy and make everything look really clean and professional.
Take you two binding pieces. Fold in 1/2 lengthwise, right sides out, and press.

Step 15
Lay your bindings, folded edge in and raw edges out, on top thefront of your mask. Pin and sew with serger or straight/zigzag. Do both sides.

Step 16
Now we need to do our binding corners. Press your binding out and trim the edges so that they overhang the mask 1/2”. (I only have a photo of this with a different mask that I was making).


Step 17
Fold over the corners of all 4 overhanging binding pieces. Your new fold line should line up with the finished edges of the mask and should form a 45 degree angle. Press all 4.

Step 18
Fold the outside of the binding in to line up with the edge of your finished seams. Press. Repeat x4.

Step 19
Fold your binding towards the wrong side of your mask and pin. This shows the wrong side. Your corners should be neatly tucked in because of the last two steps.

This is what the right side should look like.

Step 20
Last step! Sew on the right side, with a straight stitch, right in the seam between the mask and the binding. Back stitch really well on each side.

I chose to attach my mask with elastic behind the ears. Personally, having worn many kinds of masks, I find that these fit more snugly than the ones that tie behind the head. If you are having a hard time finding elastic, and do not having any, let me know, I can amend the tutorial for a mask using ties instead of elastic.

A few tips for wearing them safely:
-They have to fit snugly, if the elastics are loose, tie a slip knot on one or both sides.
-Wear the mask up high on the bridge of your nose, pinching the wires to fit the bridge of your nose.
-Pull the bottom under your chin.
-Wash with hot water and soap after each use.
-Do not flip it over, only wear it one way.
-For no reason can you touch your face while you are wearing it without thoroughly washing your hands first (in hot water and with soap for at least 20 seconds…Even if you have been wearing gloves).

Happy mask-making! If you made a filter pocket, cut filter to fit the finished mask size. Insert a new coffee filter or a new vacuum cleaner bag/filter each time you wear the mask and when you remove it, discard and re-wash your hands. You may need to roll it to get it in, and then smooth it flat once inside.
