Upcycled Heart Shaped Pillow

I will start off by saying that Valentine’s Day is NOT my thing. It could come and go and I wouldn’t even notice. Meh. That’s how I feel about it. My little people however, get quite excited and love to celebrate pretty much anything and everything. Last week Cadence presented a very compelling argument trying to convince me to throw a huge celebration in honor of Rabbie Buns Day. So it isn’t a surprise that handing out cards and treats are always welcomed. Each year I try to find a few little things that I can do with or for them that make them feel like we are celebrating V-day, while not driving myself over the bend or filling the classroom with dollar store/landfill-bound trash.
While I could take or leave Valentine’s Day, I do like hearts and the colours pink and red…I can wrap my head around those. I have made a bit of a compromise and have come up with a few fun and easy DIYs this week that we will be happy to use once Valentine’s Day is over (two adorable t-shirts to come). And it will have my little lady ultra pumped for a tiny bit of Valentine’s festivity. Bonus.
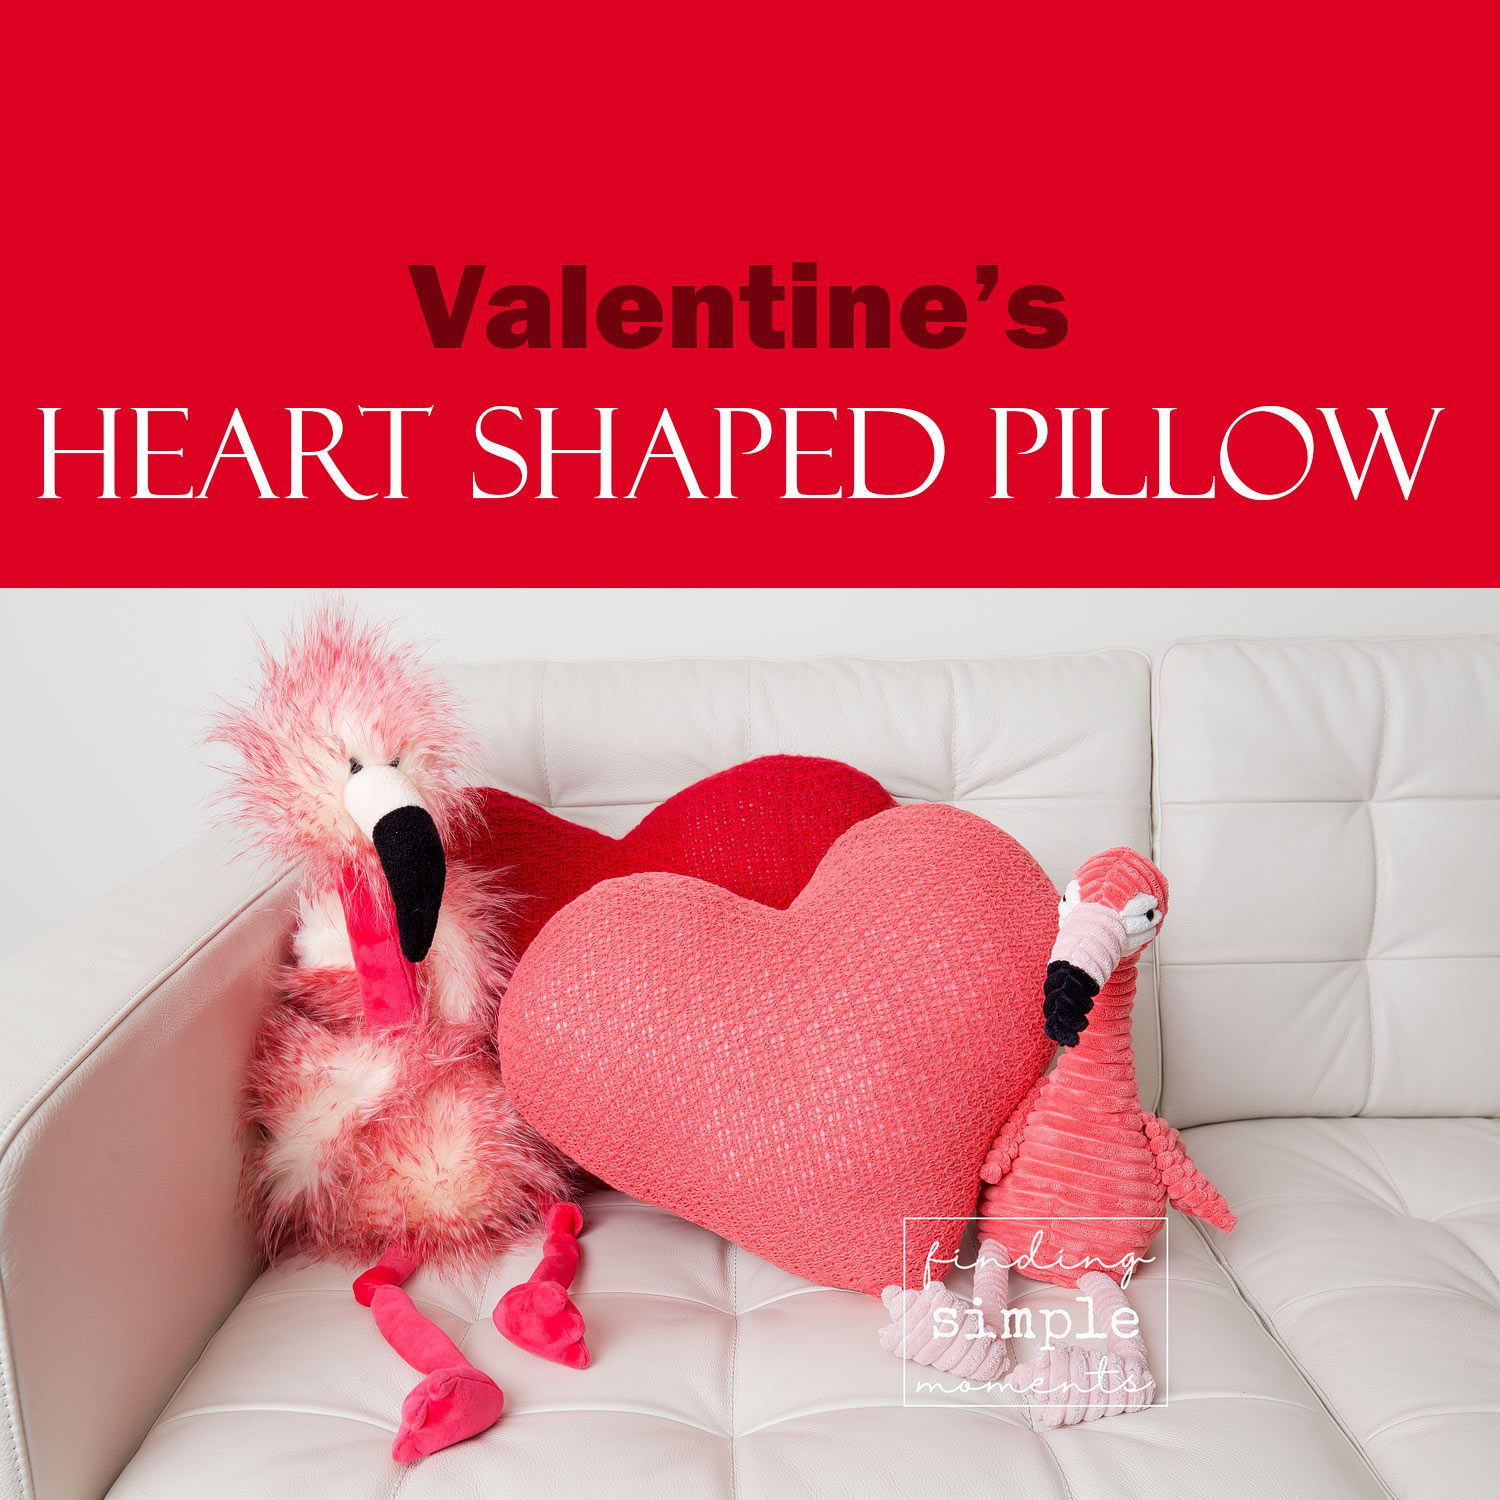
My daughter has been planning a new room for a while and has settled on a Flamingo theme. It’s super cute and we have some fun plans in the works. A pink, red and white foundation fits well with these two super soft heart-shaped pillows. They will look great on her bed for years to come. Even turquoise and purple would be festive enough and if it fits with your child’s décor, it would be adorable. Nothing says it needs to be pink or red.
I started by grabbing these red and corral sweaters at a local second hand store for dirt cheap and obviously washed them before I started. They matched her flamingo theme perfectly!

If you want to try it out, it is far simpler than you expect and you need only a very basic sewing knowledge.
Start by making a pattern. I used 4 pieces of computer paper, taped together. I liked having the perfect seam down the middle (from taping) so that I didn’t have to fiddle to get the angles perfect.
There are photos of every step below to help you understand my semi-acceptable descriptions.
1. I knew I wanted a right angle for the bottom of my heart so that the pillow didn’t end up too narrow. To do this all you have to do is fold one of the bottom corners up to meet the middle paper seam, and then do the same thing on the other side.
2. Fold your paper in half.
3. Draw the top of your heart.
4. Cut it out.
5. Pin it to the WRONG side of the sweater (turn it inside out before you place the pattern and pin it).
6. Cut it out, through both layers.

7. Remove the pattern from the sweater, and re-pin the two layers together (double checking that the wrong sides of the sweater are facing out.)


8. Slowly zigzag stitch with approximately a 3/4” seam, backstitching well at the beginning and well at the end, leaving about a 3” hole to stuff it.


8. Turn it right side out. Take a deep breath and don’t panic when you see how wavy and ugly the edges look. It will sort itself out once you stuff it.
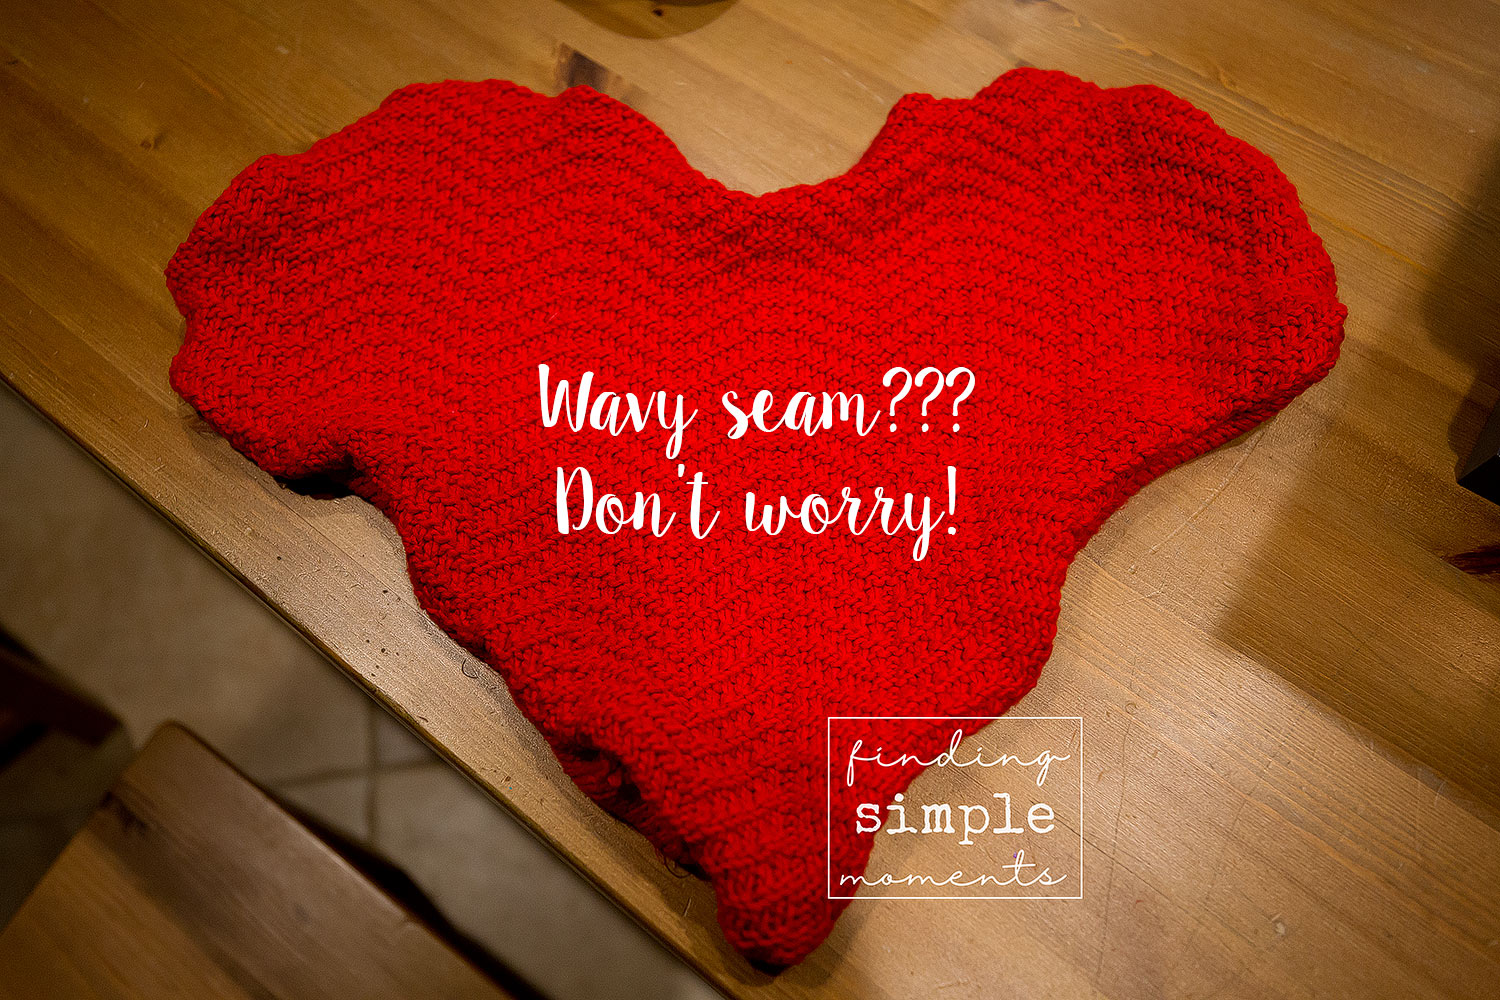
9. Filler’ up! I used a pound of polyfill. It will feel like you are over stuffing it, but keep going until all of the waves are gone.

10. Tuck your raw edges in and hand sew the hole closed.

There you go, that’s it. Looks pretty cute with those flamingoes, doesn’t it? Send me a photo if you try it.
Maybe next year I will surprise Cade and we’ll figure out how to better commemorate Rabbie Burns. I am going to have to do a little research and figure out who that is first. For now, we’ll go with the pillows.
~Q